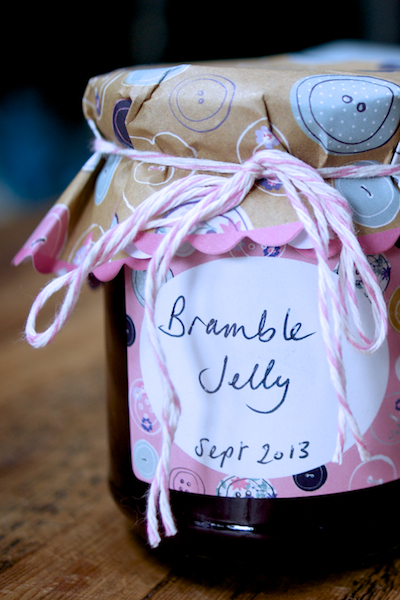
Our good friends have just moved to a new place with a truly magical garden, filled with apple trees and blackberry bushes. The children had a smashing Enid Blytonesque time running around the garden, climbing trees, duelling with sticks and picking the fruit that went into this beautiful clear jam.
Bramble jelly is one of my all time faves. I think I particularly loved it as a child because it didn’t have any bits in it! My mum still makes it, and I’m very grateful to her for passing on her recipe to me so I can share it with you lovely lot.
Making jelly is a bit more time consuming than a simple jam. Once you’ve boiled up your fruit and water you need to pass it through a jelly bag overnight to glean the juice. You can buy a simple jelly strainer set from Lakeland which pack away flat, so really don’t take up much space.
I would say this little investment is worth it when you’re rewarded with jewel bright jellies to give as gifts or just to spread on hot buttered toast.
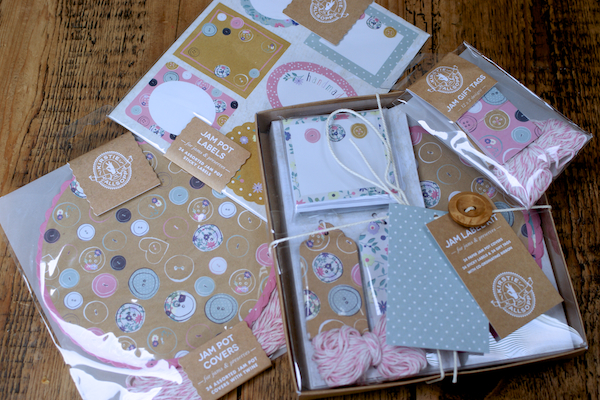
If you are going to gift your jellies, a jar dressed up in the new Kirstie Allsopp range from Lakeland looks rather fetching. They’re super girly, just as you’d expect from the goddess of countryside chic. Or if you’re on a tight budget why not cut out circles of wrapping paper to cover your lids and find some matching curling ribbon.
Bramble Jelly
blackberries
apples, chopped
granulated sugar
(quantities up to you, then see step 3 for calculating sugar weight)
1. Wash your blackberries, chop up your apples – no need to peel or core and put the lot into a very large stainless steel pan. Pour over enough water to cover the fruit and bring to the boil. Allow to bubble away until the fruit is lovely and mushy so that the pectin (natural setting agent) has been released from the fruit. Allow to cool.
2. Set up your jelly bag on the stand with a large bowl underneath. Ladle your mushy fruit into the jelly bag and leave to strain overnight or until it has stopped dripping completely. Do not be tempted to squeeze the bag to release any more juice as this tends to lead to a cloudy jelly at the end.
3. Measure the amount of juice you have and then calculate how much sugar you will need. For every 575ml of juice you will need 450g sugar.
4. Thoroughly wash enough jam jars and lids for your jelly in hot soapy water, rinse and dry in a low oven. Put the measured sugar into an ovenproof dish and warm up in the oven too. Put a saucer in the freezer.
5. Pour the juice into a very large stainless steel pan, add the warmed sugar and dissolve over a low heat. Then turn up the heat and bring to a rolling boil until setting point* is reached then turn off the heat.
6. Using a metal spoon, skim off any scum from the surface and pop into a little dish. Then pour the liquid into your prepared jars using a funnel to prevent any slopping and splashing. Tightly seal with lids, then allow to cool before labelling.
*setting point – you can try one or all of these tests to see if you’re jam has reached setting point
Temperature test: 220F on a jam thermometer with a fierce rolling boil going down in the pan.
Flake test: dip a wooden spoon in the jam and remove it holding it above the pan, twirl the spoon a few times to cool the jam. Let the jam fall off the spoon. If the drips run together and form flakes that ‘hang’ on the edge of the spoon, a setting point has been achieved.
Cold saucer test: get your saucer out of the freezer, put a bit of your jam on the dish and whack it in the fridge for a minute or two. Get your saucer back out of the fridge and draw your finger across the surface. If it’s starting to set a thin film should be forming and will crease as your finger goes over it. If it doesn’t then boil it a bit longer and try the test again.
Disclosure: Thanks to Lakeland for sending me the range of labels and covers from the Kirstie Allsopp range to try out… you can find them here
I’m linking this recipe up to A mummy too’s Recipe of the Week event as i’m hoping it’s something people will want to think about making this season 🙂


Beautiful. I’m loving jam-making and preserving at the moment and this looks great. I’ve got those Lakeland labels too – they’re really pretty 🙂
If you would like, I’d love you to pop over and link this up with #recipeoftheweek. You can find it under ‘Food’ on my home menu. x
Thanks Emily… I’ll hop on over now 🙂
Yay, so pleased to see you joined in. It really is a beautiful post 🙂 Pinned and Stumbled. There’s a new linky live now for this week. Please do pop over and join in 😀
I’m just in the middle of boiling up this jelly and having never made jelly/jam before I have absolutely no idea how long, approximately, I should be boiling it for?? Help, anybody?!?? I’m trying the saucer technique, and have been boiling it for 45 mins so far…
Hi Emily! How much liquid do you have? Bigger quantities take a while to reach setting point. Try the flake test with the spoon – it’s a very quick way to check it’s setting. Good luck!!! I always get anxious at the boiling stage!
this is a gorgeous recipe Katie. I too have been making preserves much more the last couple of years. We have managed to get lots of nice blackberries. I made apple jam this weekend but not tried combining. Maybe next year when the hedgerows are full again I shall definitely be returning to this post.
Thanks Nazima – it’s one of my absolute faves. Sadly it was a small batch so it’s been gifted away so I’ll have to wait till next season now!!!!